For the last few weeks I've been on a spree of finishing my own projects and sewing for me. This particular purse got my attention years ago s a joke, and I decided I wanted one to remind me not to take myself so seriously. This was entered into a "documentation light" SCA competition in Colorado called Queen's Prize. I may edit this some more for a more in depth research project on the Renaissance concepts of Sacred and Profane Love.
Venetian Lute Shaped Purse
The Honorable Lady Isabelle de Calais
Queen’s Prize Fall 2019

Purses in 16th Century Vencie
People have been carrying items they find precious to them through out our time period. You will often see bags suspended from belts, pilgrims carrying bags with their possessions, but it is incredibly rare to find a Venetian woman carrying any bag in the art of the 16th century. We know they still had items dear to them, and we have the surviving purse which I have been inspired by. It may be that these purses are being worn under gowns such as Elenora of Toledo’s soccocia found with her burial clothes. The original purse is actually quite small 13x8x6 centimeters in the descriptions I have found, and the currator describing it believes it may have also been worn suspended from the waist.
Method
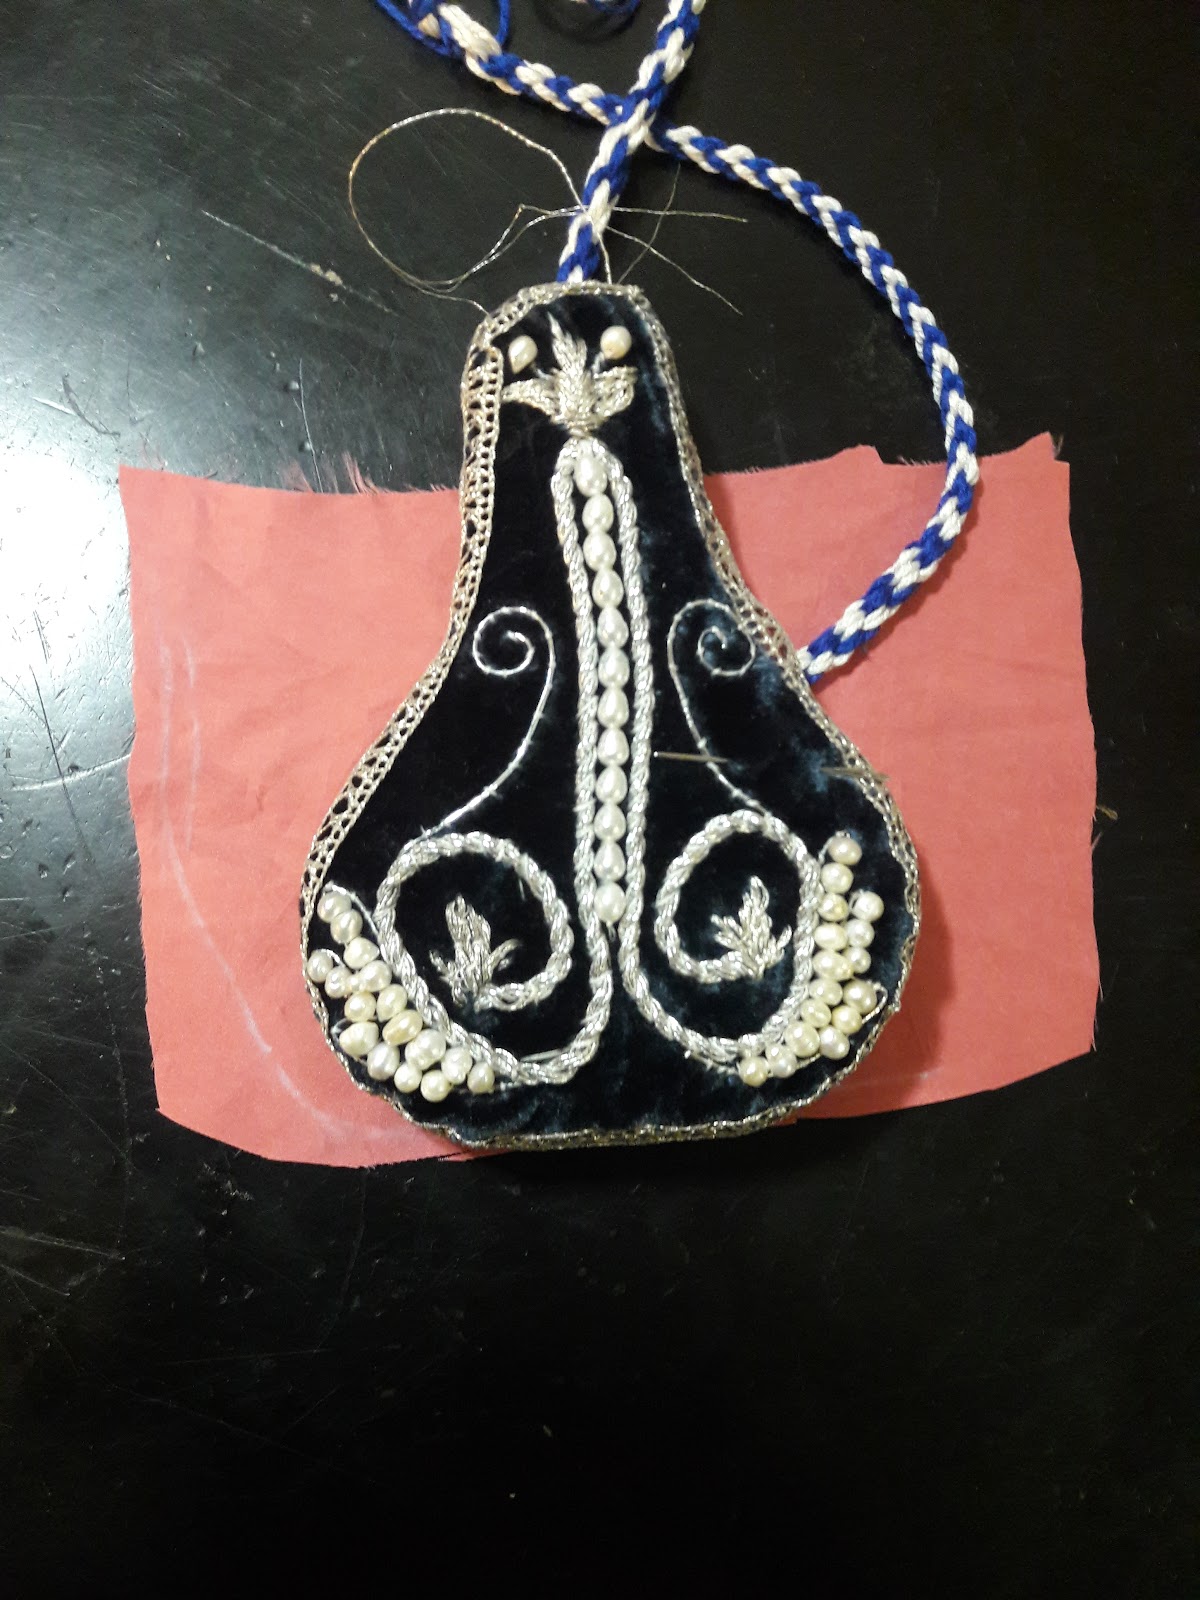
The original purse is described as being made of green velvet, lined in a pink silk, and embellished with pearls and gold. My version will be made in blue silk velvet, lined in pink silk like the original, and embellished with silver thread and pearls.

The original has not been taken apart for restorations or repairs, so we do not know for certain what is being used to stiffen it. I have used two pieces of cardboard wrapped in wool felt inspired by the descriptions of hat stiffeners by Janet Arnold. The cardboard bases helped me add a bit of rigidity while keeping the purse lightweight, as well as being a relatively low stress item to work with while I figured out the shape and proportions of this purse. Below is the scaling test I did to decide on a final shape and size. My purse was enlarged by a quarter of an inch all the way around so I could more easily use it for small tokens. The left is the period original proportions, center is my final choice, and the right was an attempt to enlarge the purse.
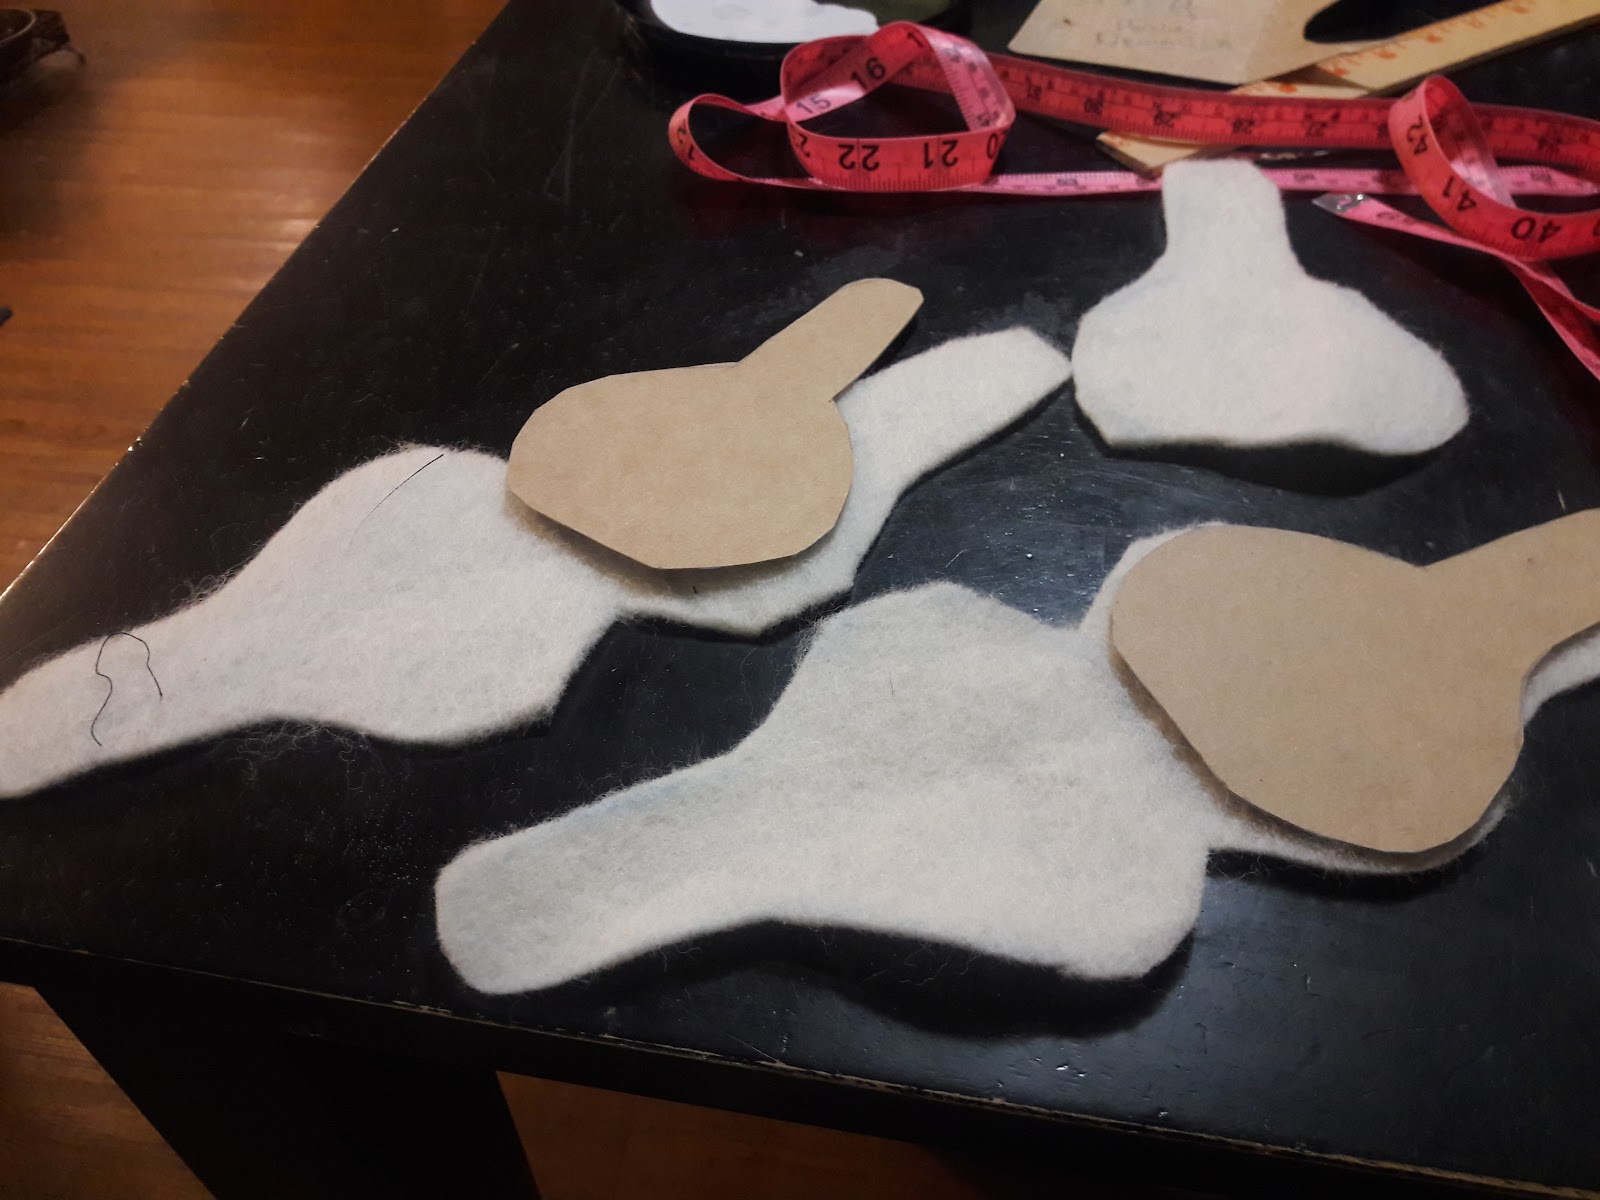
Once I had finalized the size and created a form to build this sculptural purse around I needed to start chalking out the shapes onto the silk velvet and creating my designs for embroidery.
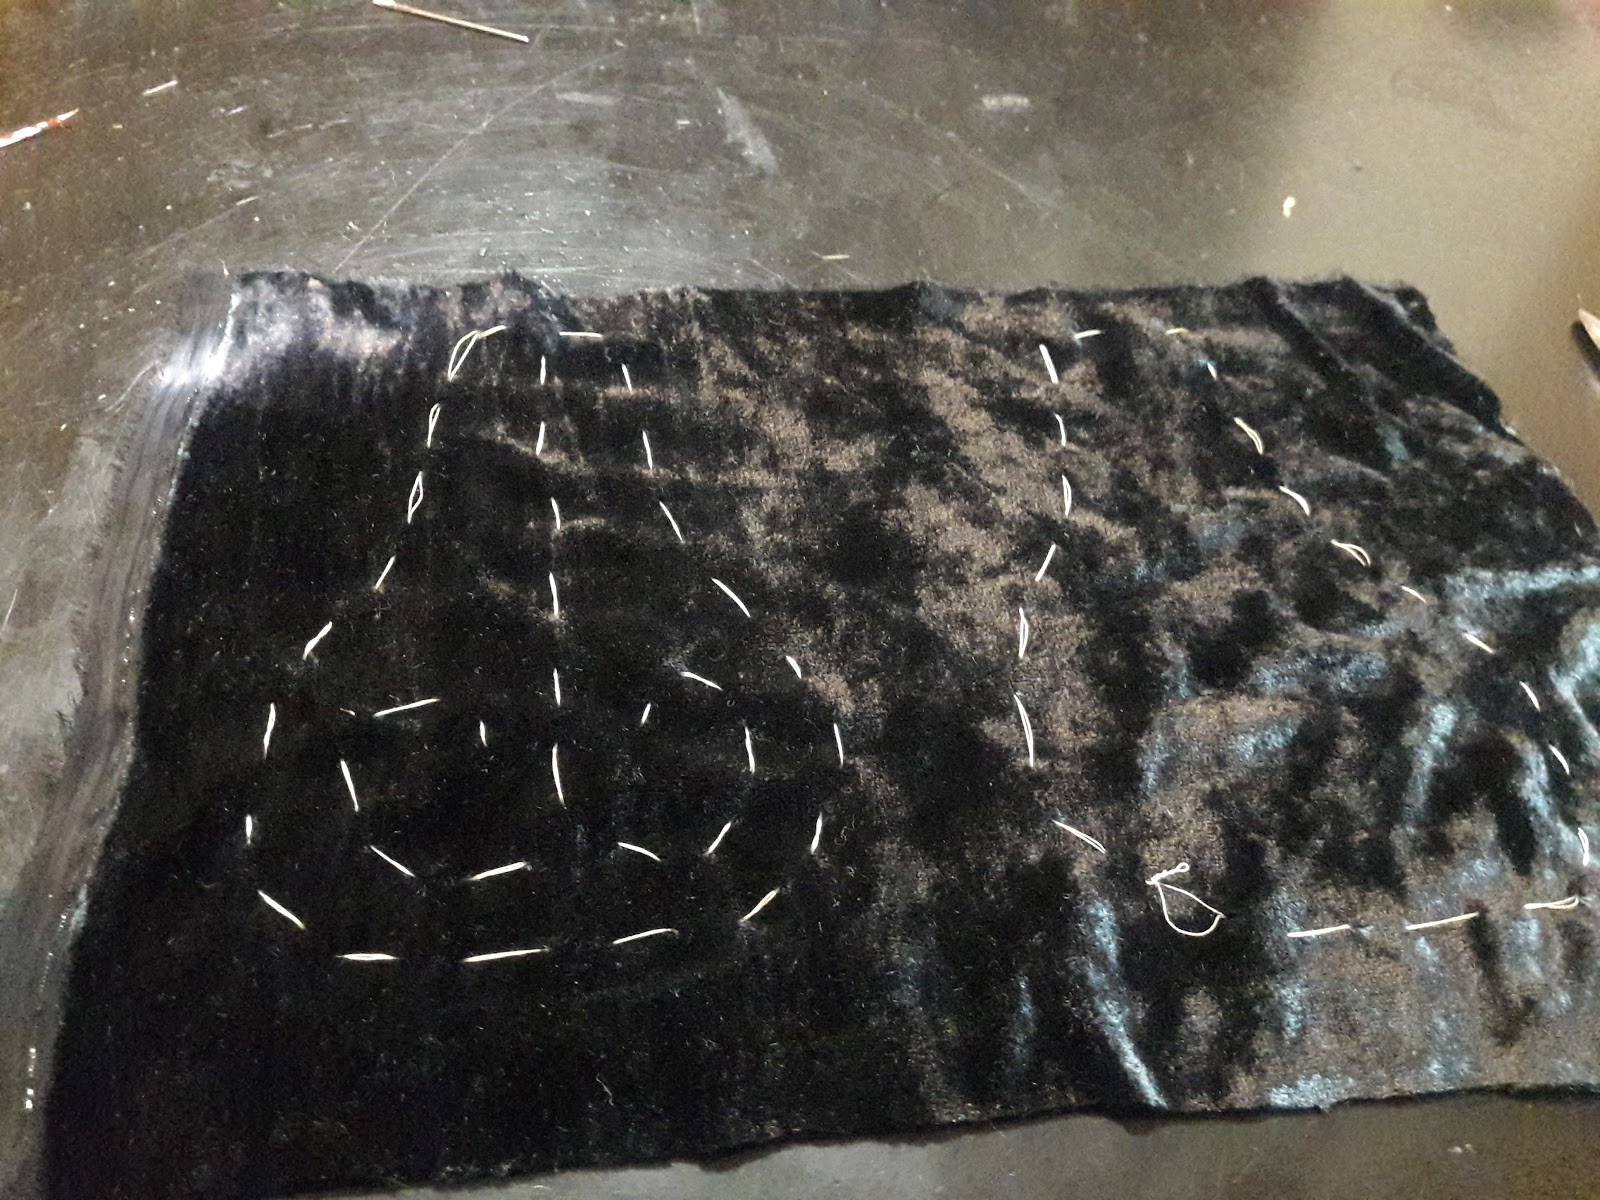
In my experience the easiest way to transfer designs for embroidery onto velvet is to mark the design on the back, I used tailors chalk for a consistent line, and then to use a large running stitch so the design can be seen on both sides, while not rubbing off. I used a bone needle to apply the design to my velvet and do most of the construction because the needle I purchased was so smooth it did not snag the velvet.
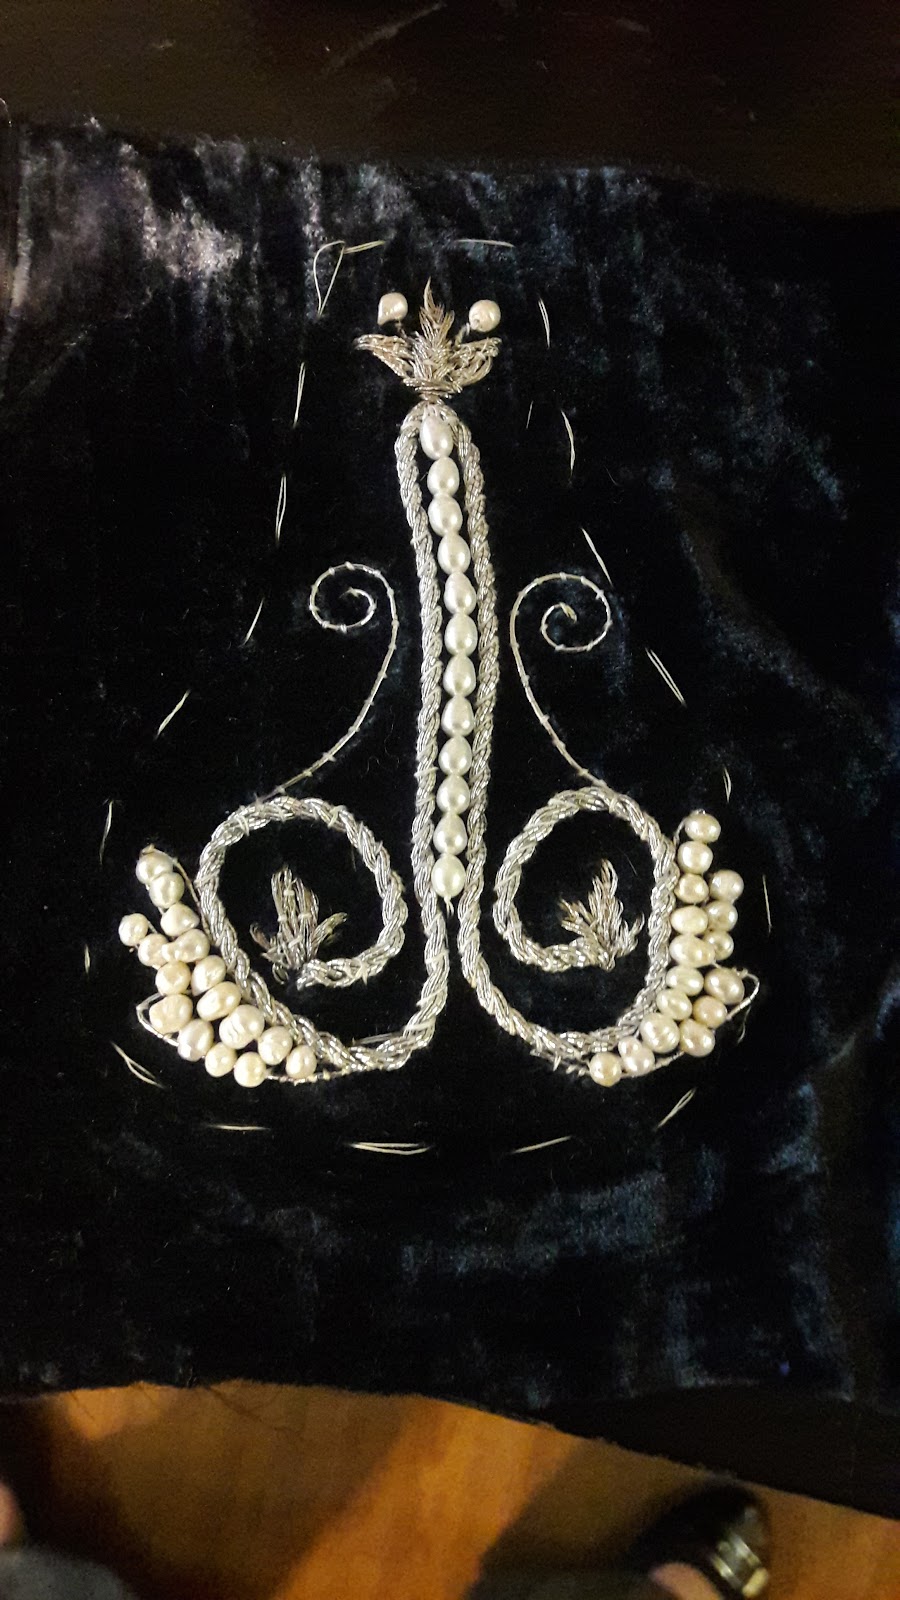
On the original’s design there are two hearts being pierced by an arrow along the upright of the purse and floral pieces below. The curator believes that the purse was probably a love token based on these symbols. The design was achieved with a mix of silk and gold work. I wanted to keep my design focused more on my precious metal threads and simplified the design to resemble more of a lute with my favorite flower, lilies worked into the motifs.
To accomplish the embroidery I had to place the silk velvet in a frame to keep it from distorting while I worked. While I used real silver thread for my metal thread embroidery, the passing threads holding the metal in place are a fine while silk. The constant wrapping motion created by the passing thread while couching leads to fine metal threads snapping and exposing the silk core over time. The same silk was used to secure some of the filling satin stitches of fine silver and pearls. I used my bone needle for as much of the embroidery as I could to prevent snagging, but I did have to use a modern steel needle with a larget eye to plunge the ends of the metal threads to the back to be secured. The sides of the purse were originally decorated with more cord, and leaves. As I am not a member of the order of the laurel I have chosen to use a piece of faux silver bobbin lace in a period correct pattern instead.
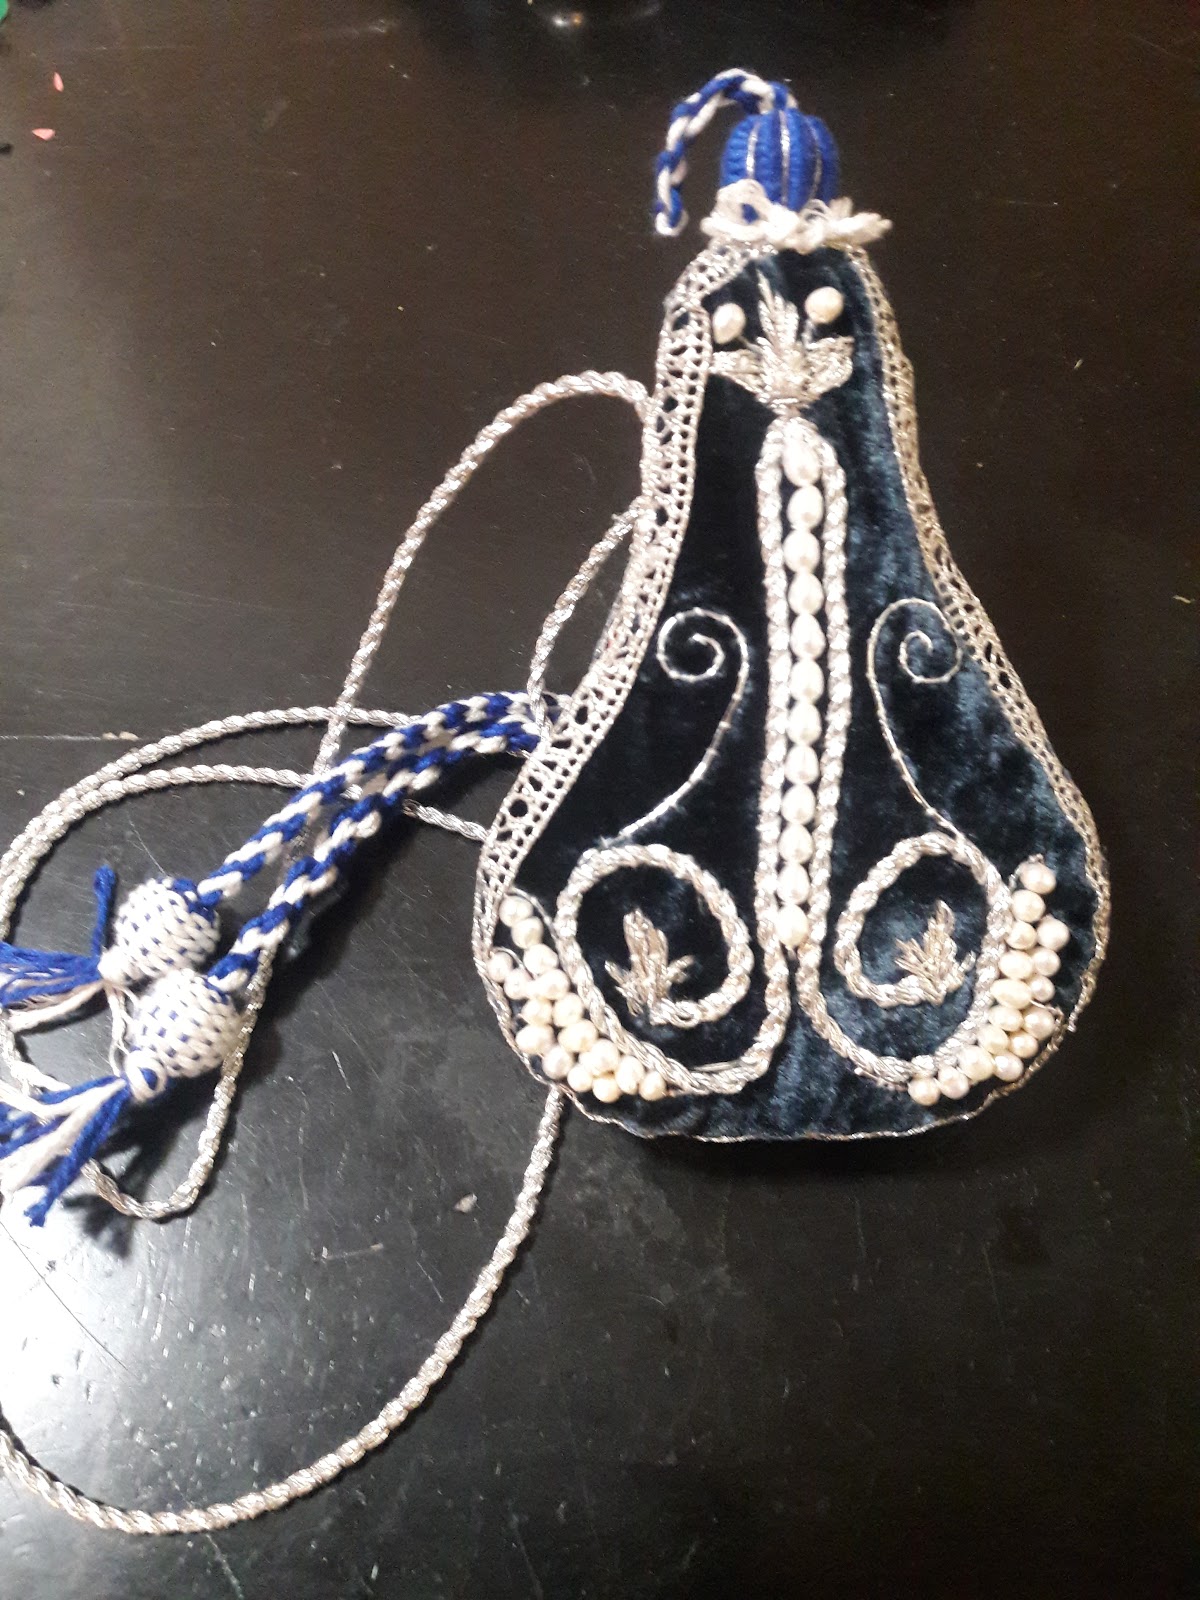
When it came to detailing the back of the purse, including the proportions of the pouch and amount of decoration I referred to another purse in the Rijks museum (pictured left). Their website as a similar purse from the same time frame, but only displays the back online.
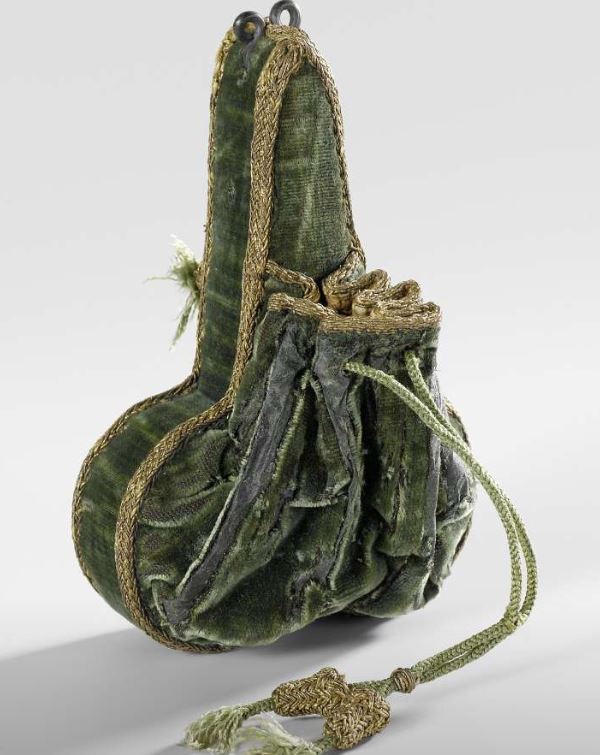
The Rijks pouch is a simple drawstring secured to the more rigid base I already created. Eyelets were made using an awl and bound in silk thread. The top edge has a more elaborate gold braid along the top edge. The drawstring is a simple silk cord with gold worked button embellishments.
My pouch was made with a “D” shape to the flap which then gathers up as seen in the green purse. For my cord I used 6 loop fingerloop braid which created a fun spiral pattern. The drawstring braid was inserted through the base before I finished covering the sides with velvet and metallic lace. I attempted to replicate the pattern on these buttons with contrasting white and blue silk to match my braid, but produced a tabby woven style covering instead.

The final steps included making one more button to embellish the top with. I chose to to a period satin cover to the wooden bead and then cover it in silver spines to tie the look into the rest of the purse. After attaching it I used the extra silk thread to add loops imitating the top of the original purse. There is also a small piece of twisted cord coming out of the top of this button reflecting our original. I think this adds a shorter length to hang this from when wearing. For the longer side strings of my original inspiration I could not manage a nice piece of finger loop braid long enough to make a nice hanging string so I reverted to using a length of silver cord which was already a part of the embroidery.
Conclusions
This was the first project I have sew completely with a bone needle and I found it to be a wonderful tool. I know they did have bras by this point in time but the few stitches I tried kept snagging the velvet. Embroidering on silk velvet proved to be a challenge because the material is so fluid in drape. While I have taken some departures from the originals, I believe this is a good approximation of a purse in this style. The Venetians were famous across Europe for their license and morals. Hopefully you find this to be a nod to that spirit.

Bibliography
Arnold, Janet. Patterns of Fashion 3. Quite Specific Media Group. 1985.
Crowfoot, Elisabeth, Frances Pritchard, and Kay Staniland. Textiles and Clothing 1150-1450. Boydell Press.2001.
Orsi Landini, Roberta and Bruna Niccoli. Moda a Fireze 1540-1580.Pagliai Plistampa. 2005.
Wake, Anabella. “Extant Purse” Accessed 9/9/2019 http://realmofvenus.renaissanceitaly.net/workbox/extpurse.htm
Rijks Museum. “Case” BK-KOG-29. Accessed 10/2/2019 <http://hdl.handle.net/10934/RM0001.COLLECT.16209>
Comments
Post a Comment